How to Fix Wall Panels Peeling Off After Installation?

Time:2026-09-08 Author:Liam
0%

Wall panels should stay flat, secure, and clean after installation. Yet many homeowners later notice lifted corners, open seams, or panels sliding from the wall. If you are asking, “why are my wall panels peeling off after installation,” the cause is usually more than weak adhesive. Moisture, dust, uneven surfaces, incorrect glue, and rushed preparation can all create failure.

Mike Holmes, a veteran contractor and renovation expert, often says, “Make it right.” That simple advice matters with wall panels. A smooth-looking installation can still hide trapped moisture or poor bonding underneath. In my experience, peeling often begins at one small edge. Then temperature changes and daily humidity make the damage spread. Sometimes the panel was blamed too quickly. The wall may have been damp, greasy, dusty, or freshly painted.

This guide explains how to inspect the damage and fix it without creating a larger problem. You will learn when to remove loose sections, how to clean and prepare the wall, and which adhesive practices improve durability. We will also examine ventilation, wall movement, and panel weight. These details are easy to overlook. I have seen repairs fail because installers reused contaminated adhesive or pressed panels onto an uneven surface. That mistake is frustrating, but useful to study. A durable repair depends on finding the original failure, not simply adding more glue. If moisture continues behind the panel, even a careful repair may peel again.
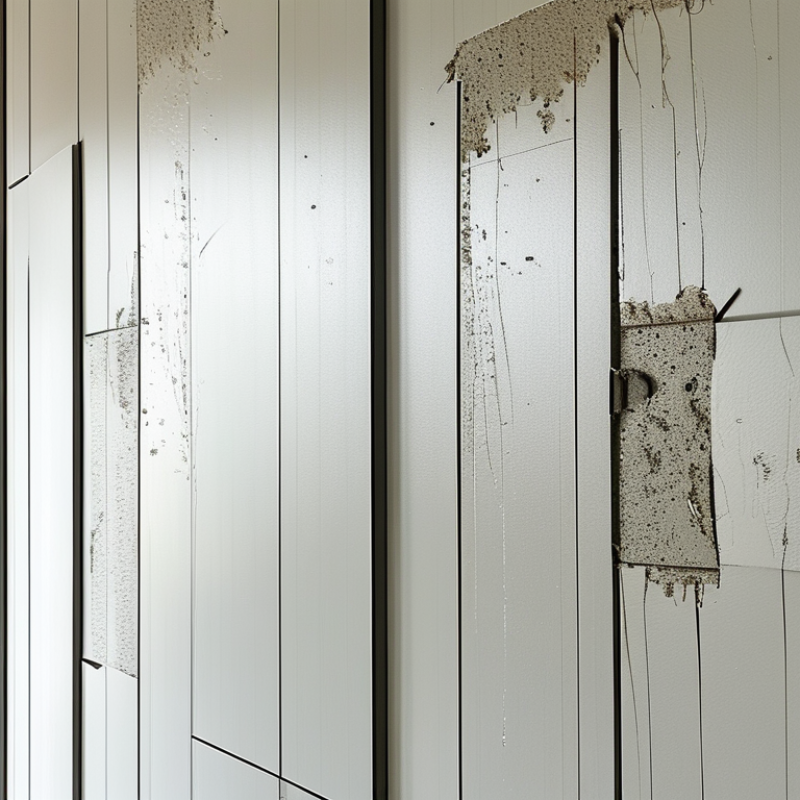
How to Fix Wall Panels Peeling Off After Installation?

Assess Peeling Severity with ASTM D3359 Adhesion Ratings (0B–5B)

Wall panels peeling after installation often indicate weak adhesion, trapped moisture, or an unsuitable substrate. Before repairing the surface, assess the failure with an ASTM D3359 cross-cut adhesion test. This method rates adhesion from 0B to 5B.

A 5B result shows clean cuts with no coating or finish removed. A 4B result allows tiny flakes at intersections. Ratings of 3B or lower show increasing detachment and require closer investigation. A 0B result means severe failure, with more than 65% of the tested area removed.

Test a cured, representative area, not only the easiest visible section. Use a sharp cutting tool, make a consistent cross-hatch pattern, brush away loose fragments, and apply pressure-sensitive tape. Remove the tape at a controlled angle, then compare the result with the ASTM rating images.

Keep the panel surface dry and record temperature, age, location, and failure pattern. Small details matter.

In field inspections, I have found that a good rating can hide moisture behind the panel. That is why one test may mislead. Check for soft plaster, dust, grease, uneven adhesive coverage, and water staining.

Remove loose sections before testing the substrate again. Clean and dry the surface, correct the moisture source, and follow the adhesive manufacturer’s stated preparation requirements. Do not bond over unstable material.

A score below 3B usually deserves removal and reinstallation rather than a quick edge repair. Even a 5B reading cannot correct movement or poor panel support.

Measure Substrate Moisture Using ASTM F2170 Before Repairs

How to Fix Wall Panels Peeling Off After Installation?

Peeling wall panels often signal trapped moisture beneath the surface. Do not remove loose panels and immediately apply fresh adhesive. The substrate may still be releasing vapor. ASTM F2170 provides a reliable method for measuring in-situ relative humidity inside concrete slabs before repairs begin.

A qualified technician drills test holes at the depths required by the standard. Concrete drying from one side commonly uses a deeper probe location, while drying from two sides uses a shallower location. Follow the current project specification carefully. Record probe depth, temperature, test location, and readings after stabilization. Surface meters alone can miss moisture deeper within the slab. This step is often skipped.

Wait for readings to meet the flooring or panel system’s documented moisture limit. Remove failed adhesive, dust, and visibly damaged material. Let the surface dry under controlled conditions, not with excessive heat that may create uneven drying. I have seen repairs fail again because workers tested one dry-looking corner. The center stayed damp. Test several representative areas, especially near walls, joints, and plumbing routes. Keep the report with installation records. It may reveal a pattern later. A rushed repair can look perfect for a week, but reliable work begins with measured conditions and honest documentation.

Check Temperature, Humidity, and 48-Hour Panel Acclimation

Wall panels can peel when the room conditions change faster than the adhesive can cure. Before installation, measure the air temperature and humidity with a simple digital meter. Aim for 18–27°C and moderate humidity, usually around 40–60%, unless the panel instructions specify different limits. Avoid installing over a cold wall, damp plaster, or a surface warmed by direct sunlight. The wall should feel dry and stable, not merely look clean.

Leave unopened panels in the installation room for at least 48 hours. Keep them flat, fully supported, and away from heaters, windows, and exterior doors. This allows the panel core and finish to adjust gradually. Cutting or bonding panels immediately after delivery is a common mistake. I have seen panels look perfect at first, then curl at the edges overnight. That failure was not always poor adhesive; the material had not finished acclimating.

If peeling has already started, do not press the loose section back immediately. Remove it carefully and check for dust, grease, moisture, or uneven plaster underneath. Record the room temperature and humidity for several days. A small moisture problem can hide behind a visually dry wall. Clean and dry the substrate, then follow the adhesive’s curing time without moving the panel. In some cases, the original panel has warped permanently and needs replacement. My first repair attempts were sometimes too quick, especially when the surface looked dry. That assumption deserved more testing.

Prepare a Clean, Dry, Level Surface for Proper Adhesive Bonding

Wall panels rarely peel without a cause. In many repair jobs, the adhesive failed because the wall was dusty, damp, or uneven. I once pressed panels onto a freshly painted surface that felt dry. It was not ready. Within weeks, the edges lifted near the shower area. Moisture had remained beneath the paint film. Check the wall with your hand, not just your eyes. It should feel clean, dry, and firm. Rub a white cloth over it. Dust means more cleaning. Use a straightedge to find ridges and hollows. Small defects can create empty pockets behind the panel.

Remove loose paint, wallpaper, grease, and old adhesive. Scrape carefully, then vacuum the surface. Wipe it with a suitable cleaner and allow full drying time. Do not rush this stage. A damp wall can look perfect and still weaken the bond. Repair holes and shallow cracks with compatible filler. Sand the repairs until the straightedge sits flat. On glossy paint, lightly abrade the surface for better grip. Then remove every trace of sanding dust. Keep the room within the adhesive maker’s recommended temperature range. Cold surfaces slow curing. Excess heat can skin the adhesive too quickly. Apply adhesive evenly, especially near corners and panel edges. Press the panel firmly with a clean roller. I sometimes overestimate wall flatness, so I check again before pressing. That small pause prevents expensive rework. Leave the panel supported while the adhesive cures, rather than trusting immediate tack.

How to Fix Wall Panels Peeling Off After Installation? - Prepare a Clean, Dry, Level Surface for Proper Adhesive Bonding

Preparation Dimension Recommended Condition Common Problem Corrective Action Verification Before Installation
Surface Cleanliness Free from dust, grease, oil, wax, loose paint, soap residue, and wallpaper adhesive. Contaminants create a weak layer between the adhesive and the wall, causing poor initial grab or later peeling. Remove loose material, wash greasy areas with a suitable cleaner, rinse when required, and allow the wall to dry completely. Wipe the wall with a clean, dry cloth. No visible dust or transferable residue should remain.
Moisture Control The substrate must be visibly dry, with no active leaks, condensation, damp patches, or water migration. Moisture can soften some adhesives, reduce bond strength, and encourage mold growth behind the panel. Repair plumbing or waterproofing defects, improve ventilation, and postpone installation until the wall has dried. Check corners, plumbing areas, exterior walls, and joints for dampness before applying adhesive.
Surface Levelness The wall should be flat and stable; a practical screening limit is about 3 mm variation over a 2 m straightedge unless the panel instructions specify otherwise. High spots prevent full contact, while hollows leave unsupported areas where panels can flex and detach. Sand high spots and fill low areas with a compatible patching compound. Remove ridges and feather the repairs smoothly. Place a straightedge against the wall in several directions and mark any gaps or rocking points.
Structural Stability The substrate must be firmly attached, with no movement, crumbling, blistering, or delamination. Adhesive may bond to a loose surface layer while the loose layer separates from the wall. Remove unstable material, repair cracks or damaged drywall, and secure loose boards or backing before installation. Press and tap the surface lightly. It should feel solid and should not flex, flake, or sound hollow over damaged areas.
Paint and Coating Compatibility Paint must be well bonded, clean, fully cured, and compatible with the selected adhesive. Peeling paint, glossy coatings, or uncured finishes can become the failure plane. Scrape and sand loose paint. Dull glossy areas and apply a compatible primer when required by the adhesive instructions. Use painter’s tape or a cross-hatch test on a small area to identify weak or lifting coatings before installation.
Surface Porosity Highly porous surfaces should be sealed when recommended; glossy, non-porous surfaces may require abrasion or a bonding primer. Excessive absorption can dry the adhesive too quickly, while a sealed glossy surface may prevent mechanical grip. Apply a compatible primer or sealer and allow it to dry fully according to its technical instructions. Test a small prepared area. The adhesive should spread evenly without disappearing immediately into the substrate.
Temperature and Humidity Keep the room and materials within the adhesive and panel manufacturer’s stated installation range; avoid extreme heat, cold, or high humidity. Temperature and humidity affect adhesive working time, curing speed, and final bond strength. Condition the panels and adhesive in the room, control ventilation, and avoid installation during condensation or unusually damp conditions. Confirm that the wall, panel, and adhesive are at a stable room temperature before application.
Adhesive Application Use the correct adhesive, apply the specified coverage, and follow the stated open time and curing period. Insufficient adhesive, excessive open time, poor coverage, or premature movement can lead to hollow spots and peeling. Apply adhesive with the recommended tool, cover edges and field areas as directed, press evenly, and support the panel during curing. Before curing, check that the panel is fully seated without large voids, raised edges, or visible adhesive starvation.
Panel Alignment and Pressure Panels should be positioned accurately and pressed uniformly across the entire bonded area. Uneven pressure leaves air pockets and prevents adhesive transfer to the substrate. Use a clean roller, pressing block, or evenly distributed hand pressure as appropriate for the panel material. Inspect seams, corners, and edges for consistent contact and correct alignment before the adhesive sets.
Curing Protection Keep panels still and protected from impact, water, steam, and heavy loads until the adhesive has fully cured. Movement during curing can break the developing bond even when the surface preparation is correct. Use temporary supports or tape where permitted, and follow the adhesive’s full cure time before cleaning or loading the wall. Check for movement at edges and seams only after the stated curing period has passed.

Note: Always follow the specific panel and adhesive technical instructions. The 3 mm over 2 m flatness value is a practical screening guideline, not a universal requirement for every wall panel system.

Reinstall Panels and Verify Adhesive Cure Against Manufacturer Data

Peeling wall panels usually signal a bonding failure, not merely a surface defect. I have seen panels release where dust, moisture, or uneven plaster remained behind the adhesive. Start by supporting the loose panel, then remove it carefully without widening the damaged area. Scrape away every weak adhesive ridge. A clean, firm substrate matters more than adding extra adhesive.

Check the wall with a dry cloth and inspect for damp patches, powdery paint, or movement. Repair unstable areas and allow them to dry fully. Apply fresh adhesive according to the installation sheet, including bead spacing and coverage. Do not rely on a thicker layer to correct a badly uneven wall. Press the panel evenly, and use temporary supports where necessary. Small gaps often reveal poor pressure during installation.

Cure time must match the manufacturer’s published data. Verify the required temperature, humidity, open time, and full-cure period before removing supports. A room may feel dry while the adhesive remains soft underneath. Wait longer when ventilation is limited or the wall is cool. Then test a hidden edge gently, rather than pulling the panel sharply. I once underestimated overnight humidity, and the repair failed again. That mistake changed my inspection routine. Record the installation conditions, adhesive batch details, and curing time. If the technical data is unclear, contact the adhesive supplier before reinstalling the panel.

How to Fix Wall Panels Peeling Off After Installation?

Reinstall loose panels only after removing failed adhesive, preparing the substrate, and confirming the adhesive cure time against the product’s technical data. The chart shows typical minimum and full-cure waiting periods commonly listed for different adhesive chemistries at approximately 23°C and 50% relative humidity.

Typical reference ranges: actual cure time depends on temperature, humidity, bond thickness, ventilation, substrate porosity, and the specific manufacturer’s instructions.

FAQS

: Why do wall panels peel after installation?

: Trapped moisture, dust, weak plaster, or uneven walls can cause bonding failure. It is rarely just a surface defect.

Should loose panels be removed and reattached immediately?

No. Measure substrate moisture first. The concrete may still release vapor beneath the panel.

How does ASTM F2170 help before repairs?

It measures relative humidity inside concrete slabs. Surface meters may miss moisture deeper inside.

Where should moisture tests be taken?

Test several representative areas, including corners, centers, wall edges, joints, and plumbing routes. One dry corner proves little.

What information should moisture testing record?

Record probe depth, temperature, location, stabilization time, and readings. Keep the report with installation records.

How should the wall surface be prepared?

Remove failed adhesive, dust, powdery paint, and unstable material. The substrate must be clean, firm, and fully dry.

Can extra adhesive fix an uneven wall?

Usually not. Follow the required bead spacing and coverage. A thicker layer may hide the problem temporarily.

How long should temporary supports remain?

Follow the adhesive’s published open-time and full-cure requirements. Cool rooms or poor ventilation may require longer curing.

How can curing be checked safely?

Test a hidden edge gently after the required cure period. Do not pull the panel sharply.

What mistakes can cause another repair failure?

Testing only one area, using excessive heat, or removing supports too soon can create repeat failures. I once underestimated overnight humidity.

Conclusion

If you are wondering, “why are my wall panels peeling off after installation,” the problem may be related to weak adhesion, moisture, surface contamination, or unsuitable installation conditions. Begin by assessing the peeling severity with the ASTM D3359 adhesion test, which rates adhesion from 0B to 5B. Before making repairs, measure the substrate’s internal moisture using ASTM F2170 to identify dampness that could prevent the adhesive from bonding properly. Also check whether temperature and humidity were within the recommended range and whether the panels were acclimated for at least 48 hours.

For reliable reinstallation, remove loose material and prepare a clean, dry, smooth, and level surface. Apply the appropriate adhesive evenly and press the panels firmly into place, following the installation instructions. Allow sufficient curing time and verify that the adhesive has reached the required strength according to the manufacturer’s technical data. These steps can help prevent recurring peeling and improve the long-term stability of the wall panels.

Liam

Liam

Liam is a dedicated marketing professional with a profound expertise in the industry, where he excels at highlighting the unique advantages of our core products. With a keen understanding of market trends and consumer needs, Liam frequently updates our company’s professional blog, providing......