Learning how to hide wires behind fluted wall panels requires more than creating a clean visual surface. The wiring must remain safe, accessible, and compatible with the panel’s depth. A small mistake can leave cables pinched behind narrow grooves or trapped beneath adhesive. That is why planning matters before cutting the first panel.
Licensed electrician Heath Eastman offers a practical reminder: “Plan the wire path before closing the wall.” His advice reflects a basic professional principle. Decorative panels should conceal wiring, not conceal electrical problems. Measure the outlet locations, identify the stud positions, and check whether the existing cables need professional adjustment. A voltage tester, level, cable clips, and a flexible fish tape can make the work more controlled. Still, tools do not replace judgment.
The best approach to how to hide wires behind fluted wall panels begins with a simple layout. Mark every cable route on the wall. Leave service access where possible. Avoid forcing thick wires into shallow channels. It may look tidy at first. It may not remain safe.
For real projects, consult a qualified electrician before modifying fixed wiring or cutting into a wall. Local codes and wall construction vary. Even experienced installers can miss hidden pipes or cables. A removable panel section may feel less perfect, but it provides valuable access later. Good design accepts that small compromise. Safety should remain visible in the planning, even when the wires disappear from sight.
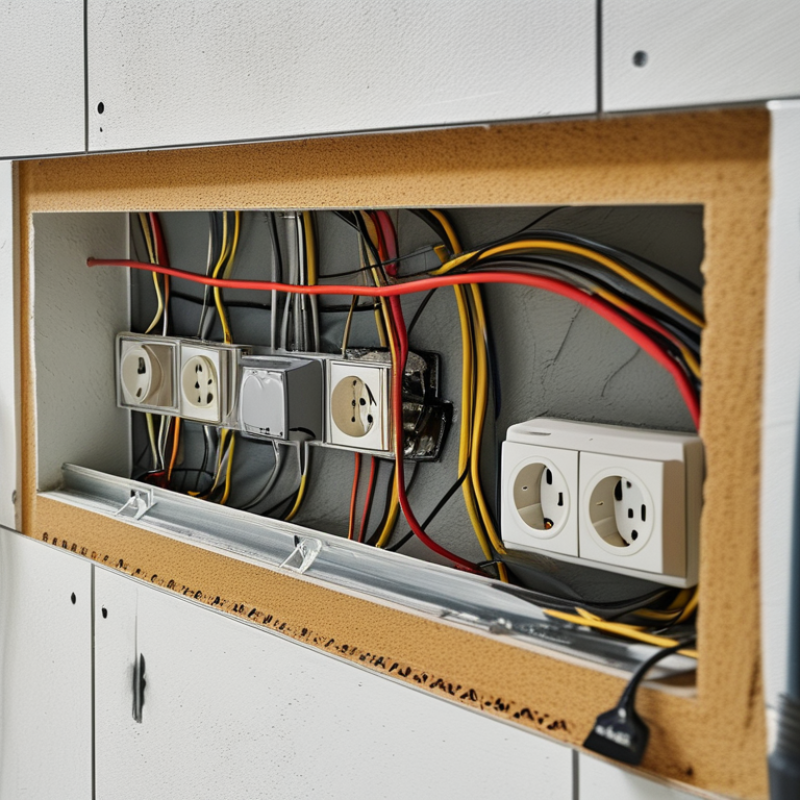
Before hiding wires behind fluted wall panels, assess the wall, wiring, and final panel layout. Use a stud finder, circuit tester, and inspection records, not assumptions. Mark studs, outlets, switches, plumbing routes, and existing cable paths on masking tape. Never cut blindly.
NFPA’s Home Fires Involving Electrical Distribution and Lighting Equipment report estimated 32,130 U.S. home fires from 2016 to 2020. These fires caused approximately 470 civilian deaths, 1,100 injuries, and $1.3 billion in property damage. The numbers justify careful planning.
De-energize the circuit before opening any access point. A qualified electrician should verify concealed connections and add approved boxes where necessary.
Measure the panel width, slat spacing, outlet positions, and cable exit points together. Keep wires inside suitable pathways, without crushing them against battens or sharp fasteners. Leave removable access near junction boxes. Small details matter. I once planned a clean symmetrical layout that placed a power outlet behind a slat. It looked excellent on paper, but daily access became awkward. That mistake changed my process: place furniture, lighting, and service points on the drawing before cutting panels. Allow a few millimeters for uneven walls, but do not use gaps to hide poor wiring. A straightedge and a full-size cardboard template can reveal problems early.
Hiding wires behind fluted wall panels starts with choosing a safe cable-hiding method, not the fastest one. The panel gaps may conceal cables, but they should not become an unplanned electrical channel. Turn off the power before inspection. Confirm the circuit is dead with a suitable tester. A qualified electrician should check fixed wiring, especially when cables enter walls or connect to outlets. Local electrical rules may require conduit, protective plates, or specific cable spacing.
For low-voltage cables, a shallow, accessible raceway can work behind a removable panel section. Use smooth edges and avoid sharp bends near the flutes. Keep power cables separate from data or audio cables where practical.
Never bury loose extension cords behind the panels. They can heat up, remain difficult to inspect, and create a hidden failure point. Fire-resistant cable protection is sensible near lighting, power supplies, or warm equipment. Leave enough slack for future repairs.
Measure twice.
A small access opening may look less perfect, but it supports safer maintenance. I once planned a completely concealed route and later regretted the lack of access. The cleaner result was not the better result. Secure cables so they cannot rattle against the backing wall. Do not compress them beneath tightly fitted panels. After installation, check for heat, movement, and pinched insulation. Photograph the route before closing the panel. This simple record can help later, although it is not a substitute for professional inspection.
Prepare the wall before cutting any panel. Mark every cable route with a level and pencil. Keep channels vertical or horizontal for easier future tracing. Use a shallow chase for low-voltage wires, but never cut into structural supports. Electrical cables require suitable protection and local code compliance. Ask a qualified electrician when power wiring is involved.
Create clean pass-throughs with a hole saw. Place them behind equipment, not in visible grooves. Add smooth grommets where wires cross panel edges. Measure twice. A loose opening can let cables rub against sharp backing material.
I once positioned a pass-through too close to a mounting cleat, which forced an awkward cable bend. Rechecking the layout would have saved time.
Leave a small service loop behind each device. Label both cable ends before closing the panel. Install mounting blocks where televisions, shelves, or speakers will attach. These blocks transfer weight into the wall structure, rather than the decorative slats. Test every connection before final installation. A removable panel section is also useful for repairs, although it may interrupt the pattern slightly. That trade-off is worth considering. Keep cables separated from heat sources, plumbing, and moving hardware. Photograph the completed routes before covering them. Future maintenance becomes much easier.
Concealing wires behind fluted wall panels works best when the cable route is planned before any panel is cut. I measure from the outlet to the equipment, then mark a straight, reachable path on the wall. Hidden junctions should remain accessible, and mains wiring should be handled by a qualified electrician. Low-voltage cables still need protection from sharp edges and excessive bending.
Install the fluted panels over the concealed wires only after testing every connection. I use suitable wall channels or protective conduit, keeping the cable slightly away from screws and adhesive zones. A small service gap behind the panels can prevent crushing and make future repairs less destructive. Dry-fit each panel first. It reveals uneven walls, outlet conflicts, and careless measurements.
My first attempt looked clean but left almost no room near the cable exit. That mistake made the final connection awkward. Now I mark outlet centers directly on the panel and drill openings gradually, checking the fit after each pass. Do not rely on adhesive alone when panels are heavy; use appropriate mechanical fixings for the wall structure. Leave a simple record of cable routes before closing the surface. It may seem unnecessary, but walls hide mistakes very well.
Hiding wires behind fluted wall panels looks simple, but testing deserves careful attention. I measure the cable route twice, then photograph it before covering the wall. Turn off power at the service panel. Use a voltage tester on every conductor, even when the switch appears off. A non-contact tester helps, but it should not replace proper testing. Check that cables are rated for the wall cavity and protected from sharp edges. Keep connections inside approved electrical boxes. Never bury a loose splice behind the panels.
Before fixing the panels, I run a continuity check and confirm each outlet, light, or control works correctly. Leave some service slack, but avoid large loops pressing against the fluted backing. Secure cables with suitable clips or fasteners, following local electrical requirements. Do not crush the insulation. Do not rely on adhesive alone. At this stage, I sometimes discover that the route is too tight. Moving one clip can prevent a difficult repair later. If cables pass through framing, add protection where screws could reach them. A qualified electrician should handle unfamiliar wiring or mains connections.
For the finish, mark panel centers and fastener locations before installation. Keep screws clear of hidden cables. A small pilot hole reduces splitting and controls depth. Dry-fit each panel, then inspect seams under side lighting. Fluted surfaces reveal uneven spacing quickly. Leave access to junction boxes and removable equipment. I once rushed a final cut and created a visible gap. Better measuring would have prevented it. Fill only minor imperfections with compatible repair compound, then clean dust from every groove. The wall should feel secure, without rattling or cable pressure behind it.
Inspect the wall, wiring, outlets, switches, plumbing routes, and panel layout. Never guess. Mark everything on masking tape before cutting.
Use a stud finder, circuit tester, and available inspection records. A qualified electrician should verify concealed mains connections. De-energize circuits before opening access points.
Measure from each outlet to the equipment. Mark a straight, reachable path on the wall. Keep cables away from sharp fasteners, adhesive zones, and excessive bends.
Yes. Leave removable access near every junction box and service point. Never bury a loose splice behind the finished surface. Future repairs may become difficult.
Mark outlet centers directly on the panel before drilling. Place furniture, lighting, and service points on the drawing first. I once created a symmetrical layout with an awkward outlet position.
Dry-fit every panel first. Check wall unevenness, seams, outlet openings, and cable exits. A full-size cardboard template can expose mistakes early.
Use suitable channels, conduit, clips, or other approved protection. Do not crush insulation or leave large cable loops. Add protection where screws could reach cables.
Turn off power at the service panel and test every conductor. Check continuity and confirm each outlet, light, or control works. A non-contact tester is helpful, but not sufficient alone.
Mark fastener locations and keep screws clear of hidden cables. Use pilot holes, inspect seams under side lighting, and clean dust from every groove. Better measuring prevents visible gaps.
Learning how to hide wires behind fluted wall panels begins with carefully assessing the wall, existing wiring, and planned panel layout. Identify studs, outlets, switches, ventilation, and any obstacles before deciding where cables should run. Choose a safe concealment method suited to the wall type, such as routing wires through approved channels, surface raceways, or purpose-built cavities. Avoid overcrowding, sharp bends, heat sources, and concealed connections that cannot be accessed for inspection or maintenance.
Next, mark and prepare all channels, pass-through openings, and mounting points before installing the panels. Protect cables from abrasion, keep them securely positioned, and leave access where future servicing may be required. Install the fluted panels gradually, checking alignment and ensuring fasteners do not penetrate hidden wiring. Once the panels are in place, test every connected device, verify that cables remain secure, and inspect the finish for gaps or movement. Following these steps makes how to hide wires behind fluted wall panels a safer, cleaner, and more organized installation project.

Haven Decoration