Scratches can make a well-maintained SPC floor look tired, especially near doorways, dining chairs, and busy hallways. Learning how to fix scratches on spc flooring surface starts with identifying the damage correctly. A light scuff may sit only on the protective wear layer. A deeper scratch may expose the printed design or create a sharp groove. These problems need different responses.
Begin with a clean, dry surface. Remove grit using a soft broom or vacuum with a suitable floor attachment. Wipe the area with a slightly damp microfiber cloth, then let it dry completely. Do not rub aggressively. Friction can enlarge a small mark. For shallow scratches, a manufacturer-approved SPC repair marker or color-matched repair kit may disguise the damage. Test the product in a hidden corner first. Colors can look different under daylight.
Deep scratches require more caution. Never sand SPC flooring casually, because sanding may remove the wear layer and create a dull patch. Avoid steel wool, harsh solvents, and abrasive powders. They often create more visible damage than the original scratch. A trained flooring professional can assess damaged planks and recommend filling, sealing, or replacement. Sometimes replacing one plank is safer than forcing a cosmetic repair.
The result may not be perfect. That matters.
Furniture pads, entrance mats, and soft wheels can prevent repeated marks. Check the floor manufacturer’s care guide before using any repair product. Product construction, finish, and warranty requirements can vary. A careful repair protects both appearance and long-term performance.
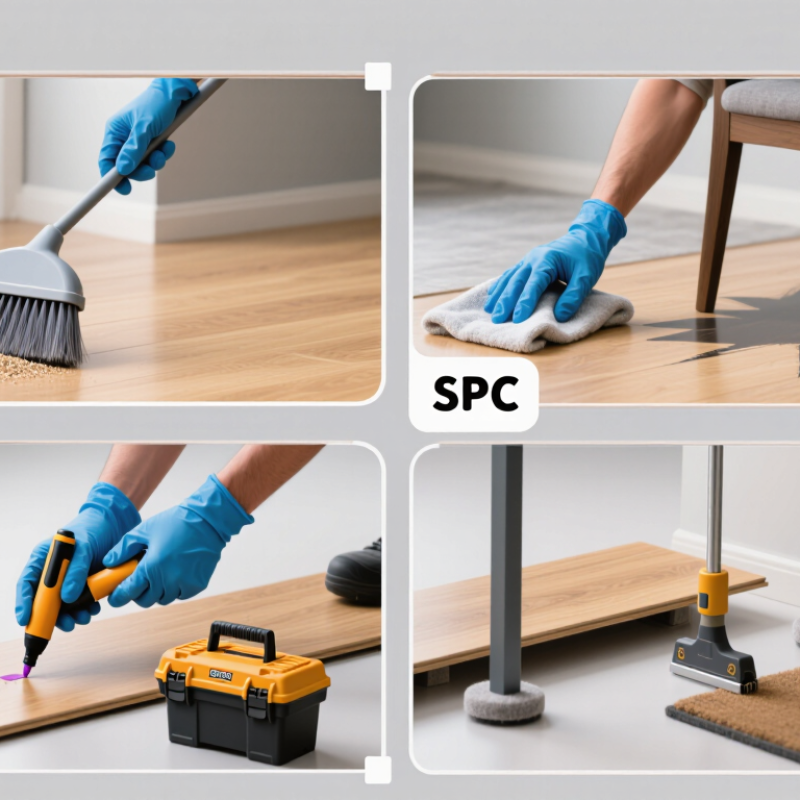
Scratches on SPC flooring are easier to repair after you identify their depth. Clean the area with a soft cloth and a pH-neutral cleaner. Dry it completely. Then shine a flashlight across the surface, not directly above it. A shallow scratch usually reflects light without exposing the printed wood or stone pattern. You may also feel it lightly with a fingernail. If the nail catches sharply, inspect the mark more closely.
0.15–0.50 mm
The transparent wear layer usually measures between 0.15 and 0.50 mm.
The transparent wear layer usually measures between 0.15 and 0.50 mm. This layer protects the decorative film from daily abrasion. A scratch within this layer may respond to an approved SPC repair product or color-matched filler. Apply a small amount first, because excessive polishing can create a dull patch. Do not sand aggressively. You could remove more protection than the scratch itself. I have seen homeowners make this mistake.
If the printed pattern looks broken, the damage likely reaches beyond the wear layer. A pale line, dark core, or raised edge also suggests deeper damage. At that point, surface treatment may hide the mark briefly but cannot rebuild the original 0.15–0.50 mm protection.
Check a spare plank if available. Replacement is often more reliable than repeated filling. The exact result depends on lighting, texture, and the scratch’s direction. Judge it from normal standing height, not only under a bright flashlight.
Before repairing a scratch, clean the SPC flooring with a pH-neutral cleaner. Choose a solution labeled for resilient flooring, ideally within a mildly neutral range of pH 6 to 8. Dilute it exactly as directed. Strong alkaline or acidic cleaners may dull the wear layer or leave a sticky film.
Sweep first, then wipe with a soft microfiber mop. Pay attention to grit near doorways. Small sand particles can behave like abrasives. Allow the surface to dry completely before inspecting the scratch under bright, angled light.
This step also supports safer maintenance. The U.S. Bureau of Labor Statistics recorded 450,540 nonfatal workplace injuries involving falls, slips, and trips in 2022.
Residue and excess moisture should not be ignored. Use a lightly damp cloth, not a soaked one, especially around plank joints. I have seen repairs fail because cleaning was rushed. That mistake is easy to repeat.
After drying, test the repair product on an inconspicuous area. For shallow marks, a manufacturer-approved repair pen or color-matched filler may work. Deeper cuts require careful filling and gentle leveling.
Never use steel wool, abrasive powder, or aggressive solvent. The Resilient Floor Covering Institute advises regular dust removal and manufacturer-directed cleaning for resilient flooring.
If the scratch exposes the core, replacement may be more reliable than repeated coating. EPA cleaning guidance also stresses following product labels and ventilation instructions.
Light scratches on SPC flooring often affect only the printed wear layer. A color-matched vinyl repair compound can disguise these marks without replacing the plank. Grand View Research estimated the global resilient flooring market at approximately 41.7 billion U.S. dollars in 2023. That scale reflects why practical surface maintenance matters.
Clean the scratched area with a pH-neutral cleaner and a lint-free cloth. Let it dry completely. Do not flood the joint. Choose a repair compound matching both the floor color and surface sheen. Test it on an offcut or hidden corner first. Apply a very small amount with a plastic spreader. Press across the scratch, not along it. Remove excess compound before it cures.
Less is safer.
After curing, gently buff the repair with a soft microfiber cloth. Avoid abrasive pads, steam, and solvent-heavy cleaners. ASTM F925 evaluates resilient flooring for chemical resistance, but a passing material test does not guarantee every cleaner is safe on your finish. Follow the flooring manufacturer’s care instructions when available.
In practice, color matching can be imperfect under strong daylight. I once applied too much filler and created a dull patch. The repair looked worse from an angle. Patience matters. Deep cuts, lifted edges, or exposed locking profiles usually need professional assessment or plank replacement.
Light scratches on SPC flooring often respond to careful cleaning and a color-matched repair compound. Remove grit first with a soft vacuum attachment. Then wipe the area with a slightly damp microfiber cloth. Never flood the joint.
For a shallow mark, apply a small amount of hard-surface filler with a plastic card. Match the plank color gradually; a perfect match is rarely achieved in one pass. Let the repair cure fully before placing furniture nearby.
Deeper damage needs restraint. SPC has a printed decor layer and a transparent wear layer above its rigid core. Sanding can cut through both layers and expose a pale, uneven patch.
ASTM F3261-21 evaluates rigid-core resilient flooring through performance requirements, while ISO 10582:2021 classifies resilient PVC flooring by abrasion resistance. Neither standard supports sanding as a repair method.
If the scratch reaches the print or core, clean it, trim only loose edges, and use a flexible repair resin made for resilient flooring. A chipped corner may require plank replacement. That is usually safer than building a thick patch that catches shoes.
In practice, repair color can shift under daylight, especially near windows. Test the compound on a hidden edge first. Some repairs look acceptable at eye level but fail after repeated chair movement. Floor protection pads and grit control still matter.
How to Fix Scratches on SPC Flooring Surface?
Small scratches on SPC flooring often affect only the protective surface layer. I usually clean the area first with a soft cloth and diluted neutral cleaner. Grit can make a shallow mark look worse. After drying, inspect the scratch under a bright side light.
For light scuffs, gently rub the area with a white melamine pad. Use very little pressure. A repair paste made for rigid vinyl flooring may also reduce the visible mark. Test it on an unseen offcut first. Color matching is not always perfect. That detail matters near windows.
A deeper scratch needs a different decision. If it cuts through the wear layer and exposes the printed design, repair products may only hide the damage briefly. Replace the plank instead. This is especially important when the scratch reveals a pale core, creates a sharp edge, or collects dirt after cleaning. I have seen owners keep polishing these marks, only to enlarge the damaged area.
Remove the skirting carefully and unlock the planks from the nearest wall when the floor uses a click system. Do not force a board from the center. The locking edges can break. Check the subfloor before installing the replacement plank. Unevenness or trapped moisture may cause the same problem again. If matching color has changed with sunlight, place the new plank in a less visible area. Keep one spare plank for future repairs. It is a small precaution, but often overlooked.
| Scratch condition | Typical visual indicator | Recommended response | Suitable method | Expected result |
|---|---|---|---|---|
| Dust or transfer mark | The mark is visible only on the surface and does not catch a fingernail. | Clean before attempting any repair. | Use a soft microfiber cloth, warm water, and a pH-neutral floor cleaner. | The mark may disappear without affecting the finish. |
| Very light surface scuff | A faint line is present, but the printed design remains intact. | Try gentle cleaning and inspect under angled light. | Wipe with a non-abrasive cloth; do not use steel wool, abrasive pads, or polishing compounds. | Appearance can improve, but the mark may remain partially visible. |
| Shallow scratch within the protective layer | The scratch may catch a fingernail slightly, while the design layer below is not exposed. | Check the flooring care instructions before using a repair product. | Use a compatible color-matched repair filler only if approved for the specific flooring construction. | The scratch may become less noticeable; repairs are usually cosmetic rather than structural. |
| Deep scratch reaching the printed design | The decorative pattern is visibly damaged, or a contrasting line remains after cleaning. | Do not sand or aggressively buff the area. | Replace the affected plank if a seamless repair cannot be achieved. | Plank replacement provides the most consistent appearance. |
| Scratch exceeding the protective surface layer | The scratch exposes the design layer, a different substrate color, or a rough edge. | Replace the plank rather than trying to restore the original wear protection. | Follow the flooring installation method and remove the damaged plank carefully. | Restores the surface without leaving an unprotected damaged area. |
| Crack, chipped edge, or broken locking profile | The plank has a fracture, missing material, raised edge, or joint that no longer fits securely. | Replace the plank and inspect adjacent joints for damage. | Use the approved disassembly or cut-out replacement procedure. | Reduces the risk of movement, moisture entry at damaged joints, and further edge failure. |
| Repeated scratches in a traffic path | Multiple marks appear in the same area, often near doors, chairs, or heavy furniture. | Repair or replace damaged planks, then address the source of abrasion. | Add entrance mats, felt pads, soft casters, and regular grit removal. | Helps prevent new scratches and reduces wear on replacement planks. |
| Unknown scratch depth | The damage cannot be classified under normal lighting or after cleaning. | Request an assessment from the installer or flooring professional. | Compare the damaged area with an unused plank and review the product’s technical information. | Avoids unnecessary sanding, incompatible repairs, or premature replacement. |
Sweep away grit, especially near doorways. Use a mildly neutral cleaner with a pH between 6 and 8. Dilute it according to the label. Wipe with a soft, lightly damp microfiber cloth. Let the area dry completely.
Moisture can weaken the repair and collect around plank joints. Residue may also create a sticky film. Inspect the scratch under bright, angled light after drying. Small details matter.
Use a color-matched repair compound made for rigid vinyl flooring. Apply a tiny amount with a plastic spreader. Press across the scratch, not along it. Remove excess material before it cures.
Yes. Test it on an offcut or hidden corner. Check both color and surface sheen. Strong daylight may reveal a mismatch. My color judgment has been wrong before.
It may reduce a light scuff when used gently. Apply very little pressure. Avoid repeated rubbing in one spot. Excessive polishing can enlarge the damaged area.
Avoid strong acidic or alkaline cleaners. Do not use steel wool, abrasive powder, steam, or aggressive solvents. These may dull the protective layer. Follow the cleaner’s ventilation instructions.
Replace it when the scratch exposes the printed design or pale core. Replacement is also better for sharp edges or lifted surfaces. Repeated coating may only hide deep damage briefly. Sometimes repair is not enough.
Remove the skirting carefully. Unlock planks from the nearest wall. Do not force a board from the center. Inspect the subfloor for unevenness or trapped moisture. Keep one spare plank for later repairs.
Learning how to fix scratches on spc flooring surface begins with identifying the damage depth and checking whether the scratch has reached the flooring’s 0.15–0.50 mm wear layer. Before any repair, clean the area with a pH-neutral cleaner to remove dust, grease, and residue without weakening the surface. Light scratches can usually be improved with a color-matched vinyl repair compound, applied carefully and blended with the surrounding finish.
For deeper damage, avoid sanding aggressively, as this may remove the protective wear layer and make the affected area more noticeable. Instead, use a suitable repair material to fill and level the scratch while preserving the plank’s surface structure. If the damage extends beyond the protective layer, leaves exposed material, or affects a large area, replacing the damaged plank is often the most reliable solution. Careful cleaning, gentle repair methods, and prompt attention can help maintain the appearance and durability of SPC flooring.

Haven Decoration