5 Tips for Soft Stone Wall Panels on Curved Surfaces

Time:2026-10-13 Author:Sienna
0%

Can soft stone wall panels be used on curved surfaces? Yes, but the answer depends on the panel’s flexibility, thickness, backing, and curve radius. Thin, flexible stone panels can follow gentle arcs around reception desks, columns, shower niches, and feature walls. Rigid panels usually need cutting, segmentation, or a specially formed substrate.

“Curved walls demand a different installation strategy, not simply more adhesive,” says John D. Wagner, an architectural stone-finish consultant with experience in commercial interiors. His point matters on site. A panel may appear flexible in the supplier’s sample, yet crack when forced around a tight corner. Test it first.

This guide introduces five practical tips for successful curved installations. Check the minimum bending radius before ordering. Build a smooth, stable substrate without sharp joints. Dry-fit every panel and mark the grain direction. Use the manufacturer’s recommended adhesive and allow proper curing time. Finally, inspect seams under the actual lighting.

Small details decide the result.

A curved wall can expose uneven pressure, open joints, or visible texture changes. Soft stone is forgiving, but not magic. Some projects still require smaller pieces, backing reinforcement, or professional fabrication. That is where experience becomes useful. Measure the curve at several points, not only at its center. Photograph the surface before installation. Keep spare panels available, because repairs may not match perfectly. This guide also considers common mistakes, practical limitations, and the honest question many installers overlook: when should a curved design be simplified?
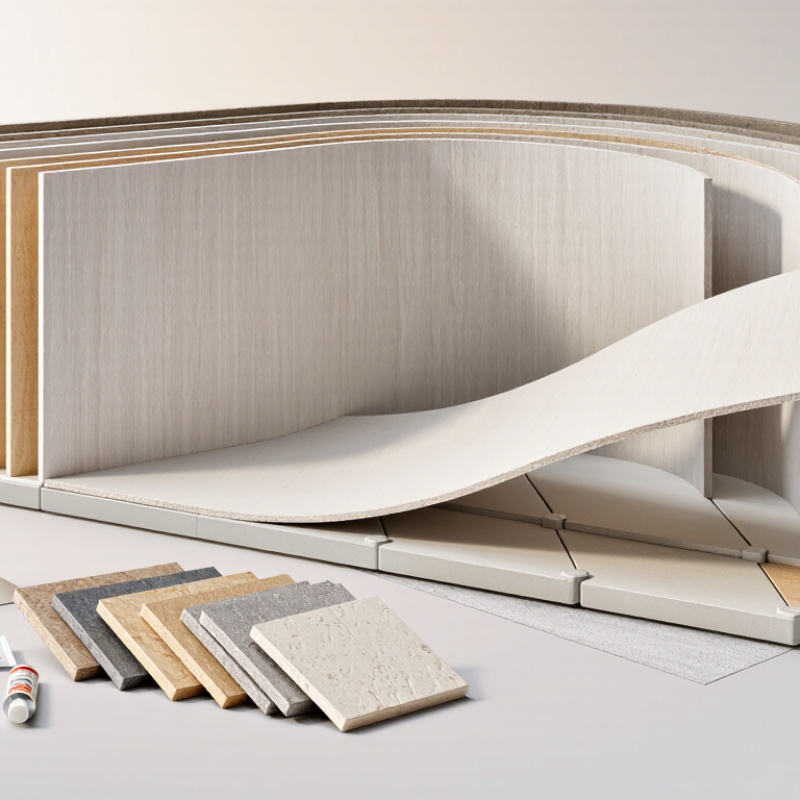
5 Tips for Soft Stone Wall Panels on Curved Surfaces

Understanding Soft Stone Wall Panels for Curved Surfaces

Soft stone wall panels are thin, flexible surfaces made to follow gentle curves more easily than rigid stone slabs. Their natural texture can include shallow ridges, uneven color, and small mineral variations. These details make each panel feel less manufactured. However, flexibility has limits. Always confirm the panel’s minimum bending radius before installation.

Tip 1: Create a full-size template from cardboard. It reveals awkward corners before you cut valuable material.

Tip 2: Check the wall carefully. Dust, dampness, and loose paint can weaken adhesion. A clean, stable surface matters more than a strong-looking adhesive.

Tip 3: Warm the panel gradually if the supplier permits it. Excessive heat may distort the backing or change the surface finish.

Tip 4: Plan seams away from direct sightlines and strong lighting. Curved walls can make small alignment errors look larger.

Tip 5: Support the panel while the adhesive cures. Temporary braces, soft straps, or carefully placed blocks can prevent slipping.

In one installation, I trusted the curve to hold the panel and regretted it; a lower edge lifted overnight. The mistake was minor, but correction took longer than preparation.

Leave room for thoughtful adjustments.

On humid walls, use suitable moisture protection and allow proper ventilation. Test a small hidden area first, because natural stone surfaces may absorb products differently.

Assessing Curvature, Panel Flexibility, and Surface Conditions

5 Tips for Soft Stone Wall Panels on Curved Surfaces

Assessing Curvature, Panel Flexibility, and Surface Conditions

Curved walls require more than a flexible panel. Measure the radius at several points, because walls rarely stay perfectly consistent. A cardboard template can reveal tight areas before cutting begins. Measure twice. Do not guess.

Check the panel’s minimum bending radius against the actual curve. Never force a panel around a sharp return. It may hold initially, then develop stress lines or lifted edges. Dry-fit each piece, mark the centerline, and plan seams away from strong visual focal points. I once trusted a smooth-looking curve and missed a shallow bulge near the floor. The panel exposed it immediately.

Surface preparation controls the final result. Remove dust, loose paint, grease, and fragile coatings. Test for moisture, especially on masonry or recently repaired surfaces. A simple plastic-sheet test can indicate trapped dampness, but professional moisture testing is safer when readings seem uncertain. The substrate should be stable, flat enough, and fully cured. Minor irregularities may be corrected, yet deep hollows need proper repair first. Apply adhesive evenly and support the panel while it sets. Keep checking alignment. Curves amplify small errors, and one uneven seam can change the entire wall’s appearance. My own early installations taught me that flexibility is useful, but it does not replace careful inspection.

5 Tips for Soft Stone Wall Panels on Curved Surfaces - Assessing Curvature, Panel Flexibility, and Surface Conditions

Tip What to Assess Practical Measurement or Guideline Recommended Installation Action Readiness
1 Measure the curve accurately Identify whether the wall has a constant radius, a changing radius, or a compound curve. Check the curve in several horizontal and vertical locations rather than measuring only one point. Use a flexible contour gauge, template, or digital measurement tool. For a circular curve, calculate the radius from the measured chord and rise. Record the smallest radius because it is usually the critical area. Create a full-size paper, cardboard, or thin-board template for unusually shaped areas. Divide the layout at transitions where the curvature changes to reduce panel stress and visible distortion. Required before cutting
2 Verify panel flexibility Compare the panel’s allowable bending radius with the measured wall radius. Flexibility depends on the stone layer, backing material, thickness, temperature, and direction of bending. Follow the panel manufacturer’s technical data for the minimum inside and outside bending radius. Do not assume that a thinner panel can safely make every tighter curve; perform a sample bend first. Test a spare panel over a template using the intended installation method. Stop if the face cracks, the backing separates, edges lift, or the natural surface develops permanent deformation. Sample test required
3 Control temperature during forming Cold materials are generally less pliable, while excessive heat can affect adhesives, backing layers, sealants, and the appearance of the stone surface. Condition panels in the installation area until they reach the site temperature. Use only the temperature range specified for the product and adhesive; avoid open flames or concentrated heat. Warm panels gradually and evenly when the product instructions permit it. Keep the panel supported against the curve while the adhesive develops initial grip, using non-marking temporary restraints. Control site conditions
4 Prepare a stable surface Check flatness, moisture, dust, paint, oil, loose material, cracks, and movement joints. A curved panel still needs continuous, sound support behind the adhesive. Use a straightedge and contour checks to locate high spots and hollows. The substrate should be clean, dry, structurally sound, and compatible with the selected adhesive and primer. Remove weak coatings, repair cracks, and correct local irregularities before installation. Do not use adhesive to compensate for major substrate waves or unsupported voids behind the panel. Substrate approval needed
5 Plan joints, edges, and movement Review panel size, seam visibility, inside and outside corners, penetrations, termination edges, and any structural or movement joints in the wall. Keep the panel layout aligned with the curve and maintain the joint width specified for the system. Never bridge an existing structural or movement joint with a rigid finish layer. Dry-fit panels before applying adhesive. Use flexible joint materials or suitable trims where required, and seal exposed edges according to the installation specification to limit moisture entry. Do not bridge movement joints

Preparing Tools, Materials, and the Installation Area

Curved surfaces punish rushed preparation. Measure the wall at several points, not just the center. A flexible panel may follow a curve, but it will not hide a changing radius. Use a flexible ruler, tape measure, straightedge, level, and a cardboard template. Mark electrical outlets, corners, and panel overlaps before cutting. Keep a second template nearby. It prevents expensive guesses.

Prepare the substrate carefully. Remove dust, grease, loose paint, and moisture. Check flatness with a straightedge, then repair hollows before installation. The surface should be stable, dry, and strong enough for the panel and adhesive. Keep panels indoors for at least 24 hours, away from direct sunlight. Follow the adhesive manufacturer’s coverage and curing requirements. A small notched trowel, soft roller, utility knife, fine abrasive pad, clamps, and clean spacers are useful. I often prepare too many spacers, but that is safer than stopping midway.

Cutting needs deliberate control. OSHA limits respirable crystalline silica exposure to 50 micrograms per cubic meter over an eight-hour shift, with an action level of 25 micrograms. Use wet cutting or suitable dust control, ventilation, eye protection, and a properly selected respirator. The U.S. Bureau of Labor Statistics recorded 1,069 fatal injuries in construction and extraction occupations in 2023. Keep the floor clear, secure ladders, and route cables away from walking paths. Do not force a panel around a tight curve. It may look acceptable briefly, then release at the edges.

Shaping, Cutting, and Fitting Panels Along Curved Walls

5 Tips for Soft Stone Wall Panels on Curved Surfaces

Shaping, Cutting, and Fitting Panels Along Curved Walls

Measure the wall at several heights. Curves often change subtly near corners, openings, and floor lines. Create a full-size paper or thin-board template before cutting the panel. This reveals gaps early and reduces material waste. The U.S. Environmental Protection Agency reported about 600 million tons of construction and demolition debris in 2018. Careful templating can help limit avoidable offcuts.

Check the panel’s minimum bending radius from its technical sheet. Never force a tight curve through heat or sudden pressure. Mark the rear face, then cut slowly with a suitable fine-tooth blade and dust control. Wear eye, respiratory, and hearing protection. Keep the cut edge away from the most visible sightline. A small mistake can become obvious under grazing light. It happens.

Fit the panel dry against the wall before applying adhesive. Start at the curve’s center and work toward both ends. Use temporary supports, gentle pressure blocks, and consistent joints. The National Institute for Occupational Safety and Health links respirable crystalline silica exposure with serious lung disease, so control dust during cutting. Allow movement at transitions, especially where different substrates meet.

Check alignment from three viewing angles. Do not trust one measurement. Curved surfaces can make straight joints appear uneven. Record the final template, adhesive batch, room temperature, and installation date for future repairs. This simple record improves accountability, although installers sometimes forget it.

Securing Panels and Refining the Finished Surface

5 Tips for Soft Stone Wall Panels on Curved Surfaces

Curved surfaces expose weak installation habits quickly. Dust, uneven plaster, or trapped air can create visible lifting. I clean the wall, check its moisture level, and confirm the curve with a flexible template. Grand View Research valued the global natural stone market at about USD 33 billion in 2023, showing the scale of demand for reliable stone applications. Yet market growth does not replace careful preparation.

Use a flexible, compatible adhesive with full, even coverage. Apply temporary braces or low-tack support strips while the adhesive cures. Keep panel joints consistent, especially near tight bends. Never force a rigid panel around a sharp radius. It may hold today and crack later. I still mark every panel twice. That sounds excessive, but small alignment errors become obvious under grazing light. The 2024 Global Status Report for Buildings and Construction reports that buildings consume about 32% of global energy and produce roughly 34% of related emissions. Lightweight stone finishes can reduce material use, but only when damaged panels are avoided and installation waste stays low.

Refine the finished surface after the adhesive has stabilized. Remove residue with a suitable cleaner, not aggressive scraping. Check each edge by hand for raised corners. A soft sanding pad can reduce minor transitions, but over-sanding may expose the backing or change the texture. Seal joints only after the surface is dry and visually uniform. I sometimes leave one flaw for review. Perfect-looking work can hide poor movement allowance. Photograph the curve, joints, and support points before handover.

FAQS

Why should a curved wall be measured at several points?

Curves can change radius across the wall. Measure near the top, middle, bottom, corners, and panel joints. A flexible ruler helps. One measurement is risky.

What should be included in a cutting template?

Use cardboard to mark outlets, corners, curves, and overlaps. Keep a second template nearby for checking. It prevents expensive guesses.

How should the wall be prepared before installation?

Remove dust, grease, loose paint, and moisture. Check the surface with a straightedge. Repair hollows before applying adhesive. The wall must be stable, dry, and strong.

How long should panels remain indoors before installation?

Keep panels indoors for at least 24 hours. Avoid direct sunlight. This allows the material to adjust to room conditions before fitting.

How can workers cut panels more safely?

Use wet cutting or effective dust control. Provide ventilation and wear suitable eye and respiratory protection. Keep cables away from walking paths. Keep the floor clear.

What happens when a rigid panel is forced around a tight curve?

It may release at the edges or crack later. Do not force it. Adjust the curve, panel, or installation plan instead.

How should panels be secured while the adhesive cures?

Apply compatible adhesive with full, even coverage. Use temporary braces or low-tack support strips. Keep joints consistent near bends. Support matters.

How should the finished surface be checked?

Remove residue with a suitable cleaner. Feel each edge for raised corners. Use gentle sanding only for minor transitions. Over-sanding can expose the backing.

When should joints be sealed and the work documented?

Seal joints after the surface is dry and visually uniform. Photograph the curve, joints, and support points before handover. Leave room for review. Perfect-looking work can still hide poor movement allowance.

Conclusion

Can soft stone wall panels be used on curved surfaces? Yes, when the panel’s flexibility, thickness, and installation method are suitable for the wall’s radius. Begin by assessing the curvature, checking for uneven areas, moisture, dust, or weak surfaces that could affect adhesion. Choose panels that can bend without cracking, and allow them to acclimate in the installation area before work begins. Prepare measuring tools, cutting equipment, adhesive, safety gear, and a clean, stable workspace.

For a successful installation, carefully measure the curved wall and create templates when necessary. Shape or cut each panel gradually, testing the fit often to avoid gaps and excessive stress. Apply the recommended adhesive evenly, secure the panel from the center outward, and support it until firmly set. Finally, refine the joints, edges, and surface transitions with careful trimming and suitable finishing materials. Patience, accurate measurements, and proper surface preparation are essential for achieving a smooth, natural-looking result on curved walls.

Sienna

Sienna

Sienna is a skilled marketing professional with a deep expertise in our company’s core products and services. With a passion for innovation and detail, she plays a pivotal role in crafting insightful blog posts that not only highlight the unique features of our offerings but also provide valuable......